


Contents
Semester 1: Developing Writing/Presentational Skills
Semester 2: Developing Programme-Specific Skills
Writing and Referencing Skills
Appendix 2: Practical Guide to Writing Essays
Appendix 3: Preparing a Poster
Appendix 4: Oral Presentations
Appendix 5: Guidelines for Laboratory Report Writing
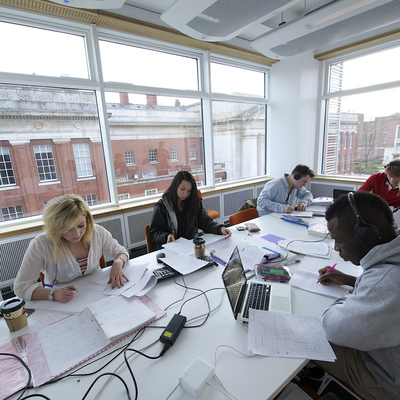
What are tutorials for?
- An opportunity for you to get to know your Advisor
This is important because your Advisor can help you both during your degree course and afterwards by providing references when you are applying for jobs.
- To develop skills and knowledge relevant to your degree subject
Your tutorial studies will extend your knowledge of your degree subject and help put the information given in lectures and practicals into perspective.
- To enhance your employability by acquiring a range of transferable skills.
These include skills in written and oral communication, organisation of information, personal interaction, teamwork and the use of information technology. Employers value these 'transferable skills'. Tutorials will also help you learn to manage your time during your degree course and improve your revision and examination techniques. A detailed list of desirable skills and how you can develop them through the tutorials is provided in Appendix 1 of this handbook. Please refer to this regularly and remember to store evidence in your Employability Skills Record on the intranet.
Assessment

Your tutorial assignments are listed in this handbook and on the BIOL10000 Blackboard site. These will be marked by your Advisor and returned to you with feedback. Your overall tutorial mark will be based on five marked assignments given over the course of the academic year and therefore, if you deliberately or accidentally skip an assignment, your mark will be brought down. In order to pass the whole Tutorial Unit, three separate elements are required:
- You have to obtain a mark of at least 40% in your tutorial assignments, averaged over the two semesters.
- You must have at least 95% attendance at tutorials.
- You must pass the Writing and Referencing Skills unit.
Tutorials are an important part of the attendance requirements for your degree course and compensation for partial failure of unit examinations is available only to students who have passed their tutorial unit. In addition, students who fail their tutorial unit due to poor marks or absences are required to complete an extended essay during the summer vacation.
Attendance
Attendance at tutorials is compulsory and will be monitored by your Advisor. If more than one tutorial has been missed over the two semesters, without an acceptable reason (see below), then you will fail the Tutorial Unit. Some tutorials will be delivered to larger groups of students as ‘Workshop’ sessions. Details of which sessions you should attend are provided on the BIOL10000 Blackboard site. You should bring a device capable of accessing the internet to the Workshop sessions to register your attendance. Some tutorials may be ‘student led’. That is, students may meet in the absence of their Advisor. You are expected to arrange venues and times with the other group members. Attendance should be taken at these meetings by a person chosen in advance and the attendance list passed on to your Advisor. Attendance at the Workshop sessions and student led meetings is also compulsory and will count towards your tutorial attendance.

Illness
If you are absent from a tutorial or unable to complete a tutorial assignment through illness, make sure you follow the guidelines on ill-health set out in the First Level Handbook. Importantly, you must alert the Student Support Office and your Advisor by 5pm on the day of your tutorial AND submit a self-certification note or medical documentation promptly to the Student Support Office on your return to University (within one week of your absence). It is your responsibility to provide this information.
If you are unable to attend for any other good reason, you must supply documentary evidence to your Advisor strongly supporting your reasons for absence. More than one unexcused absence will result in failure of the tutorial unit, exclusion from language and industrial placement programmes, and a summer resit esssay assignment. Additional unexcused absences from tutorials may lead to the issuing of a formal warning letter. Unexcused absences may have detrimental effects on decisions on progression to subsequent years of your degree programme, or even lead to exclusion from study in the Faculty.
For further information on this and other related matters, please read the relevant sections of the First Level Handbook.

Student Feedback
In order to help us maximise the benefits that you gain from tutorials, we need feedback from you, both on the tutorial activities and on your Advisor’s performance. For this purpose you will be asked to complete a unit survey at the end of each semester. It is important for us to have your opinion, as these surveys will be used to determine how tutorials are constructed and conducted in future years. Details of how to access/complete the survey will be given to you each semester.
Employability Skills

You have your own online ‘Employability Skills Record’, which is located on the intranet within your personal profile. Your Personal Advisor can also view this. The aim of this record is to help you monitor and take an active part in the development of your employability skills (e.g. presentation skills, leadership skills). You should update your ‘Employability Skills Record’ on a regular basis, and at least once per semester. The Skills Record offers you links to useful suggestions to help you to develop your employability skills. You should discuss your ‘Employability Skills Record’ with your Personal Advisor during your 1:1 meetings. There is space on your record to set targets and you should review these regularly to chart your progress and think of strategies to develop your skills further.
What you write in your Employability Skills Record should prove extremely valuable when you apply for industrial/professional placements, summer internships, further study or graduate jobs, as the topics covered reflect those you are likely to be asked about in many application processes.
Within the BIOL10000 Blackboard site you will find a resource entitled ‘Developing your Employability Skills’. This resource contains useful information about:
- Writing a good CV (including template and example CVs)
- Writing a personal statement for your CV
- Interview guidance
- Writing a covering letter
- Choosing a referee
One of your Year 1 tutorials (semester 2) will be a Workshop session delivered by the Careers Service.
One-to-One Advisor Meetings
In addition to your regular tutorials you must arrange to “meet” with your Personal Advisor at least twice per semester throughout your programme. At least one meeting should be face to face, but the second can take the form of emails if you and your Advisor agree that a meeting in person is not necessary. There are forms on the intranet that you both fill in as a record of these meetings, which should prove useful to you both when it comes to references for placements/employment, changing programmes, choosing units etc. Please prepare for each meeting by starting to fill in each form with any issues you intend to discuss with your Advisor (you can “save” as often as you like, then your Advisor will submit the final record at the end of the meeting). To locate the forms, go to “My intranet” then “My meetings”.
Tutorial Activities


The nature and content of the tutorials will depend on the requirements of your degree programme. The first semester is dedicated to the development of skills in writing and presentation, which are fundamental to all degree programmes. Activities in the second semester are, to some extent, specific to your degree programme and are designed by your Programme Director for delivery by your Advisor.
Semester 1: Developing Communication Skills
A) Listening comprehension, accessing the literature, referencing and plagiarism
In Welcome Week you will attend a Research Showcase talk. You will write a summary of this talk and email this summary to your Advisor prior to your first tutorial. The summary should be a maximum of 1 side of A4 using Arial 10pt font, 2.5cm margins, and 1.5 line spacing. Writing this summary will help you gain listening comprehension skills, which will improve your understanding of lecture content. Instructions for this assignment are available on the BIOL10000 Blackboard site.
By the end of week 3 you may have been on a library tour with your tutorial or PASS group, which will help get you started in finding different sources of information needed to complete the various assignments that form part of the tutorials. You will also receive guidance on the correct way to acknowledge (reference) the different sources of information that you use. Your Advisor will go through a tutorial activity on correct referencing and plagiarism.
Plagiarism is the use (theft) of someone else's work without proper acknowledgement, presenting the material as if it were one's own. Plagiarism is totally unacceptable in any form. Any first year student found to have plagiarised work will have to attend an interview with a panel of academic staff. The panel will determine a suitable penalty, which may include a mark of zero for the assignment or for the course unit. The penalties are increasingly severe in later years of the programme!
Early on in the semester you will do an exercise with your tutorial group on how to recognise and avoid plagiarism.
The Library’s My Learning Essentials training programme has an online resource that explains what plagiarism is and how to avoid it:
http://libassets.manchester.ac.uk/mle/avoiding-plagiarism/
The following links provide excellent resources with more information on plagiarism and how to avoid it, including self-test tutorials:
http://www.indiana.edu/~istd/index.html
http://learning.londonmet.ac.uk/TLTC/learnhigher/Plagiarism/index.html
There is also further information on plagiarism in the appropriate section of your First Level Handbook and the University’s guidance document on plagiarism can be viewed at:
http://documents.manchester.ac.uk/display.aspx?DocID=2870
B) Essay writing
Success in every degree programme involves learning how to organise your thoughts and communicate an understanding of a topic. An essay is not simply a series of facts, but a structured presentation of a logical argument, backed up with evidence, to establish a point of view. Writing an essay therefore requires careful research and planning. In Semester 1 you will complete two essays (the second of which will be formally assessed), on topics selected by your Advisor and Programme Director. You will also take part in exercises that will enable you to distinguish good scientific writing from bad and to avoid plagiarism (see above). Appendix 2 of this Handbook provides guidelines on essay writing and should be used for guidance.
To aid in developing your writing skills, you are required to attend a Workshop session on essay writing presented in week 2. You should attend the session specified for your degree programme (listed below and on the BIOL10000 Blackboard site). You should bring a device capable of accessing the internet to the session so that you can register your attendance. You will not have a small group tutorial session in week 2, so your attendance at the Workshop will count towards your overall tutorial attendance, and the same rules to absences apply as for the rest of the tutorial programme. If the session allocated to your degree programme clashes with a language unit, you may attend the other session.
Workshop 1: Week 2 only, Wednesday 11am - noon, Roscoe Theatre A
for Anatomical Sci, Biomed Sci, Immunology, Life Sciences, Neuroscience, Pharmacology, Pharmacology & Physiology, Physiology, degree programmes, and any students attending BIOL10401 data handling clinic
Workshop 2: Week 2 only, Wednesday noon - 1pm, Roscoe Theatre A
for Biochem, Biology, Biology with S&S, Biotechnology, Cell Biol, Cog Neuro, Dev Biol, Genetics, Med Biochem, Microbiology, Molecular Biol, Plant Sci, Zoology degree programmes and all students enrolled in BIOL10381.
To facilitate your understanding of plagiarism and enable you to eliminate plagiarism from your own work, the assessed essay you complete in Semester 1 will be submitted through Blackboard and put through the University’s plagiarism detection software TurnItIn (TII). You will find the submission site and instructions for submitting your essay in the Assessments area of the Blackboard BIOL10000 unit. You may find this document useful for uploading your essay file:
Should you have any technical difficulties with uploading your file you should submit an eLearning enquiry through Blackboard (a tab can be found on the left hand side of the tutorial unit site) or contact the Student Support Office.
Your Advisor will give you instructions for the page length, margins, spacing and font size for your essay submission. The deadline for submission of the draft version is 4pm Thursday week 7 (9th November 2017). Once the draft essay submission deadline has passed, you will be able to see the plagiarism report on your essay. You should review the content of the plagiarism report and if necessary edit your essay to eliminate plagiarised material. Please save a pdf of your plagiarism report as your Advisor may wish to discuss it in tutorial. This activity will assist you in learning how the University checks for plagiarism, and gives you the opportunity to learn how to recognise plagiarism in your work in order to avoid it in the future.
The final version of the essay is due 4pm Thursday week 9 (23rd November 2017). The final version of your essay will also go through a plagiarism check but this will only be for staff use, and will be considered when your essay is marked. If you do not submit a draft of the essay in week 7 you may still submit a final version for assessment in week 9, but you will not be allowed to see the plagiarism report on your final version. Late submissions of the final essay will be penalised with a 10% mark deduction per day late.
Feedback on your final essay will be available in Week 12. You should save a copy of your feedback commments for use in future assignments. Your feedback will no longer be availalbe after week 2 of semester 2, so you are strongly recommended to view it before the end of week 2 of semester 2.
You may find this document useful for viewing your draft plagiarism report and your feedback for your final version of your essay file:
http://elwiki.ls.manchester.ac.uk/groups/elearning/wiki/10ef4/How_to_View_Feedback_in_TII.html
C) ‘Frontiers of Science’ lecture
The ‘Frontiers of Science’ lecture is a seminar given by a leading researcher from the Faculty, which you are expected to attend. The lecture is aimed at a general audience, so don’t worry if you know little about the subject before you attend.
The Frontiers of Science lecture is presented during week 3 of semester 1. There are two sessions, and the same lecture will be given at each session. You should attend the session allocated to your degree programme, unless you have a clash with a language unit, in which case you may attend the other session. You should contact your Programme Director if both sessions clash with your language units.
Prof Matthew Cobb: The Brave New World of CRISPR Gene Editing
Week 3, Wednesday noon - 1pm, Roscoe Theatre A
for Anatomical Sci, Biomed Sci, Cog Neuro, Immunology, Life Sciences, Neuroscience, Pharmacology, Pharmacology & Physiology, Physiology degree programmes
Week 3, Thursday 9am - 10am, University Place Theatre B
for Biochem, Biology, Biology with S&S, Biotechnology, Cell Biol, Dev Biol, Genetics, Med Biochem, Microbiology, Molecular Biol, Plant Sci, Zoology degree programmes, and any student attending the BIOL10401 data handling drop in clinic.
Following the lecture you should write a summary, of maximum one A4 page, describing the content of the talk. Instructions for this assignment are given on the BIOL10000 Blackboard site. This assignment should be uploaded to the assessments area of the BIOL10000 Blackboard site, to the assignment called Frontiers of Science Submission, by 4pm, Thursday week 4 (19th October 2017). Your advisor will provide feedback on your summary. This feedback is for your information, and will assist you in judging whether or not your listening comprehension skills are sufficient to allow you to take accurate notes in lectures. This assignment does not count towards the tutorial unit mark and you will not receive a numerical score on it.
D) Poster presentation
Scientists often present their work at conferences in the form of a poster to communicate key aspects of their work in a visually appealing and informative manner. Constructing a good poster is a challenging task. It should allow the viewer to understand the topic, without having to spend a long time sifting through details. It should also be eye-catching, to attract the attention of anyone passing.
In your tutorial group, towards the end of Semester 1, you will choose a topic for your poster in consultation with your Advisor. You will research the topic, design and prepare your poster for display at a Poster Event held for all first-year students in the School of Biological Sciences on Tuesday 12th December at 1:30 p.m. or 2:30 p.m. (Week 12). The session you should attend will be determined by your degree programme and further information will be available from your Advisor.
The poster session is a compulsory part of the Tutorial Unit and failure to attend will result in a 20% reduction in the mark awarded.
Semester 1: Timetable
At the start of the semester your Advisor will discuss with you details of the content of tutorials for the coming semester, and also deadline dates for the assignments. You should ensure that you record assignment deadlines in a diary or add them to your online calendar.
Remember to inform your Advisor in advance if you cannot attend a tutorial for a legitimate reason and complete all the necessary steps with the Student Support Office.
Assignments Common to All Degree Programmes
| Assignment | Deadline |
| Essay | 9th Nov 2017 (draft) 23rd Nov 2017 (final) |
| Frontiers of Science summary | 19th Oct 2017 |
| Poster presentation | 12th Dec 2017 |
Semester 2: Developing Programme-specific Skills
Compulsory for All Degree Programmes
A) Practical write-up (Full reports or scientific posters)
In semester 2, students enrolled on field courses will produce a field course report to present the results of their project, and students enrolled on lab-based practical units (BIOL10412/10422) will work in a small group to produce a scientific poster describing one of the experiments undertaken this semester.
For all students, generic support will be provided via online resources available in the assessment area on the Blackboard sites of their respective practical units (BIOL10412/10422) OR the preparatory field course unit AND via the tutorial system.
- Field course students will be provided with specific information regarding the format and length of their project report in the assessment area on Blackboard of each field unit. Further generic guidelines on writing field/lab reports can be found in Appendix 5 of this handbook.
- Lab-based students will be put into groups of 2-4 by their advisor. They will be provided with a Powerpoint template for the scientific poster. They will present their poster as a Powerpoint slide to their advisor and the rest of the tutorial group in a tutorial session, and will be asked questions about the content by their advisor. Specific information regarding the poster and resources to help with producing it will be available in the assessment areas on the Blackboard sites of their respective practical units. Students should also consult the guidelines in Appendix 6 of this Handbook which explain how to write a scientific poster.
NB: Appendix 5 (full lab report) and appendix 6 (scientific poster) are very similar, so we have highlighted the differences between the two in blue font.
For all students, the marking criteria for their field report or scientific poster will be provided in the assessment area on the Blackboard sites of their respective practical or field course units.
B) Further essay writing
In Semester 1 you were introduced to the basic process undertaken to prepare an essay. Here you will extend and develop the skills you learnt in Semester 1 by researching and writing an essay of relevance to your degree programme. Your Advisor will provide details of the subject, length and assessment process. You will be expected to apply the principles taught in semester 1 relating to references to ensure that you do not have any plagiarism in your essay. You will not be given the chance to see the plagiarism reports and make edits to this essay. What you submit must be the final version, which will then be electronically checked for plagiarism. The deadline for this essay is 4pm Thursday week 8 (22nd March 2018). Late submissions of the final essay will be penalised with a 10% mark deduction per day late.
C) Employability Workshop
Writing a CV that showcases your strengths is a key step in preparing for employment applications. You may need a CV to apply for summer internships or industrial placements. The careers service will present a Workshop session during week 3 of semester 2 on how to present yourself on your CV, and how to plan your activities and interests to maximise your chances of getting employment offers. You should attend the session allocated to your degree programme. You should bring a device capable of accessing the internet to the session to register your attendance. You will not have a small group tutorial session in week 3, so your attendance at the Workshop will count towards your overall tutorial attendance, and the same rules to absences apply as for the rest of the tutorial programme. If the session allocated to your degree programme clashes with a language unit, you may attend the other session.
D) Programme-specific activities
Your Programme Director will assign the following types of programme-specific activities for you to complete with your Advisor. You will receive a mark for each activity, which will count towards your overall grade for the tutorial unit.
i) Data analysis/Problem Solving
These activities are designed to complement skills acquired in the Practical Module BIOL10402 and will focus on quantitative and analytical problem-solving tasks specific to your degree programme. Your Advisor will inform you of the details of the assessment.
ii) Group-based learning (GBL) sessions
GBL provides a means of developing team-working skills while exploring a topical issue in your degree subject. Your group will choose or be allocated a subject for investigation, in consultation with your Advisor. As a group you then research the subject, deciding amongst yourselves who should do what and the approach that should be taken. On completion of your research, all members of the group should contribute to the final outcome, which could be an oral presentation, written article or poster. The performance of the group will be assessed by the Advisor and this will contribute to your overall tutorial mark. Note that, if you are asked to give a short talk, there are some guidelines on giving an oral presentation in Appendix 4.
Semester 2: Timetable
At the start of the semester your Advisor will discuss with you details of the content of tutorials for the coming semester, and also deadline dates for the assignments. You should ensure that you record assignment deadlines in a diary or add them to your online calendar.
Remember to inform your Advisor in advance if you cannot attend a tutorial for a legitimate reason and complete all the necessary steps with the Student Support Office. See attendance section for further details.
Marked assignments (Semester 2)
| Assignment | Deadline date |
| Essay | 22nd March 2018 |
| Programme-specific assignment 1 | |
| Programme-specific assignment 2 |
BIOL10742 Writing and Referencing Skills (WRS) Unit
This Blackboard unit, which is fully online, will be available from the beginning of week 1 in semester 2. It provides additional resources throughout the semester to help you with essay writing, laboratory reports and to extend your writing, summarising and referencing skills in preparation for your Dissertation next year. On successful completion of this unit you should understand what constitutes academic malpractice including plagiarism, be aware of how we as a University detect plagiarism and the consequences of it, and be aware of how to avoid committing it. This unit will help you enhance your academic writing and referencing skills and will help you to store, retrieve and use references within Endnote. For information on the running of the course (course aims, marking, pass criteria, how to get your results) please ensure that you read the course information pages on Blackboard. An e-book, covering the writing skills content, is available to download to help with future assignments.
The deadlines for the assessments are Friday 4pm of weeks 2-8 as shown in the Table below. Extensions are not permitted. Details are available on the course information pages on Blackboard.
You MUST pass (achieve 100% in) the Academic Malpractice module AND achieve an overall cumulative score of 70% or above for the seven WRS modules to pass the tutorial unit. The Academic Malpractice mark does not contribute to the WRS mark.
| Open |
Deadline
(Fridays 4pm) |
|
| Academic Malpractice +
Pre-Assessment + Essential Language Skills1 |
29 Jan* (Mon) |
09 Feb (2) |
| Academic Style | 16 Feb (3) | |
| Text Handling | 23 Feb (4) | |
| Referencing the right way | 02 Mar (5) | |
| Planning Your Search | 09 Mar (6) | |
| Successful Searching | 16 Mar (7) | |
| Endnote Online | 23 Mar (8) |
Queries about the WRS unit should be directed to Dr Lindsay MacDougall (lindsay.macdougall@manchester.ac.uk).
Technical queries, including problems accessing the course, need to be reported to the eLearning team via the dedicated link on Blackboard (a tab, marked technical support, can be found in the menu on the left hand side of the unit site).
School Writer in Residence
The School has three ‘Writers in Residence’ who are funded by The Royal Literary Fund.
They are:
Susan Barker - Monday and Friday
Tania Hershman - Tuesday
Katherine Clements - Wednesday and Thursday
The Writers in Residence are based in the Simon Building. Please see the BIOL10000 Blackboard site for further information about the writers’ expertise and instructions for appointment booking.
Should you need help with English language skills, you can contact the University Language Centre at: http://www.ulc.manchester.ac.uk/

The PASS Scheme
PASS (Peer Assisted Study Sessions) is a scheme designed to provide pastoral and academic support for all first year students. PASS is run by students (peer assisted) with the support of the School and a dedicated staff co-ordinator: Dr Maggy Fostier.
Each first year student is assigned to a group of about 15 students of the same or similar degree programme and two PASS Leaders. PASS Leaders are Year 2, Year 3 or Final Year students who have volunteered to be involved. They have undergone training in group management, facilitation and mentoring techniques, and are there to share their experience with the students and organise the study sessions. PASS Leaders will facilitate and encourage; they won't lecture or give answers; they have been trained to ask the right questions to help the group discover a solution together, or to advise on the best approach to get to the answer.
You will have one PASS session of about 50 min at the same time every week. In week 1, you will have an induction session, in week 2, a ‘Meet & Greet’ session where you can ask any question and get advice/tips from leaders, from week 3, you will have sessions with your group and two leaders only, and the programme will be tailored to your needs. The PASS sessions are informal, flexible and interactive. The aim of the sessions is to give students the opportunity to discuss their understanding of subjects and share ideas, enabling them to find answers to problems amongst themselves and consolidate their understanding. The sessions are structured around discussions or activities designed to promote active learning, organised by the leaders. In this setting, the students benefit from the experience of the PASS Leaders and from talking to other students in the same position. The sessions are also designed to help with transition to University life, and PASS Leaders are there to provide advice on study skills such as note-taking, revision and exam techniques, as well as general advice on other University matters.
To find out when and where the PASS sessions are and the members of the groups:
- Access the BIOL10000 unit site in Blackboard
- Select the Course Content Area
- Select the PASS folder
- Within the folder there will be documents related to the PASS programme.
If you have any questions about PASS, if the timing of your session is inconvenient, or if you feel strongly about changing group, you should contact Holly Knight (Holly.Knight@manchester.ac.uk) and Dr. Maggy Fostier (maggy.fostier@manchester.ac.uk). Please email both with your problem/query.
Appendix 1: Employability
The following table outlines the transferable skills employers seek and how you can develop these. You should record examples of how you have developed and applied these skills in your Employability Skills Record so that you can use them on job applications and in interviews in the future.
| What are employers looking for? | What does that mean? | How can you develop this skill? |
| Ability to articulate what you have to offer. | Reflect on the skills you have gained throughout your tutorials and other units AND develop good communication skills so that you can talk about your skills and provide evidence that you have them to potential employers. | Reflection Update your Employability Skills Record on the intranet Communication Skills Essays (tutorials; many lecture units) Debate (some tutorials; some lecture units) |
| Self awareness | Know what your skills, strengths and weaknesses are and have examples of how and when you have demonstrated this knowledge. | When you have completed a tutorial (eg Group Based Learning exercises (GBLs), presentations etc) reflect on your performance, write examples of how you did well or could have done better in your Employability Skills Record. |
| Self management/ability to manage learning | Effectively manage your time and complete work within deadlines. | All tutorial activities and the data handling modules that add on to them have specified deadlines for which you have to plan ahead and meet. |
| Self efficacy | Belief in your capabilities to achieve a goal or an outcome effectively. If you have a strong sense of self efficacy you are more likely to challenge yourself with difficult tasks and be intrinsically motivated. | You will be supported to undertake challenging activities, successful completion of which should boost your self efficacy e.g. oral presentations, essays on unfamiliar topics, team poster presentations,GBLs. |
| Self esteem/confidence | Have a good opinion of yourself and confidence in your abilities. | You will have the opportunity to rise to the challenges provided by completing independent work to deadlines, to learn from constructive criticism and feedback from Academic Advisors and peers. |
| Critical thinking | Able to analyse an idea or a piece of work objectively and weigh up its strengths and weaknesses. Recognise your own biases and be open to new ideas if evidence supports them. | Essays and oral presentations are structured presentations of a logical argument. You will learn to read and critically analyse a number of sources of information by presenting your work in oral and written form and receiving feedback on your work. |
| Teamwork | Proven ability to work well within a team AND an understanding of the role you take within a team. | Many tutorial activities involve teamwork: e.g. GBLs, poster presentation.Community/environmental team projects may also be undertaken. |
| Project management | Project management requires effective planning, and management of resources to bring about the successful completion of specific project objectives. | Several tutorial activities take the form of projects: e.g. group poster presentations, GBLs,community/environmental projects. |
| Problem solving | Grasp what needs to be done and reach a satisfactory solution to a problem. | Group posters pose a number of problems to be solved, the data handling modules include problem solving, and all tutorial programmes include one or more exercises on problem solving. |
| Cultural sensitivity/awareness | Experience of interacting with individuals from a range of different backgrounds and ability to adapt your approach to suit the needs of the people you are working with. | We have a diverse staff and student body so you are likely to interact with individuals from a range of backgrounds during your tutorials.Community/environmental projects provide the opportunity to work within the local community, which is also diverse. |
| Leadership skills | Proven ability to lead a team effectively. | You will have the opportunity to act as chair for GBL sessions and the group poster. The chair guides discussions and makes decisions on the outcomes. If you do a community project you may also get an opportunity to identify and lead a small group project. |
| Innovation/Creativity | Being able to come up with new ideas, approaches and solutions. Thinking ‘outside the box’ and being able to suggest new/improved ways of doing things. | You will have the opportunity to be innovative in terms of your approach to topics, ideas for GBLs in tutorials, mini projects and in how you present your work and overcome problems. Your main opportunity to improve these skills will be in your final year project. |
| Written Communication | Being able to use correct spelling, grammar and punctuation. Effectively organising your ideas and communicating these in a coherent manner. | Throughout your degree you will develop your written communication skills through your assignments such as essays, dissertation and project write ups. |
| Research skills | This may refer to researching literature, searching databases, identifying appropriate resources and extracting key information or may refer to practical scientific research. Research is also an important skill when looking for and applying for jobs. | You will have the opportunity to carry out research throughout your degree. You should do extra reading around your lectures including reading recent primary literature and review articles. Research will be required for essays, your dissertation and literature review. Your main opportunity for research will be during your final year project. |
| Numeracy | Being able to work with numbers is a key skill and may range from basic mental arithmetic to being able to analyse and interpret data. | Data Handling modules and most practicals/projects are designed to help you develop your numerical skills and ability to use statistics. Numerical skills are required in your lab work to work out concentrations and dilutions and to calculate whether results are statistically significant. |
| Presentation skills | Proven ability to communicate your ideas both visually and orally. | You will undertake presentations in tutorials, field courses and as part of your final year projects. Becoming an ambassador, PASS leader or student rep gives you further opportunity to develop your presentation skills. |
For further help see http://www.careers.manchester.ac.uk/experience/skills/
The section on “Develop your skills” contains ideas on how to develop these skills beyond your degree (plus guidance on how recruiters assess for them).
The My Learning Essentials training programme offers careers advice through face–to-face workshops and online resources, visit the link below for more information:
http://www.library.manchester.ac.uk/academicsupport/mylearningessentials
Appendix 2: A practical guide to writing essays

Writing an essay is a big task that will be easier to manage if you break it down into five main tasks as shown below:
An essay-writing Model in 5 steps
- Analyse the question
What is the topic?
What are the key verbs?
- Research
Question the question—brainstorm and probe
What information do you need?
How are you going to find information?
Find the information
Make notes and/or mind maps
- Plan and sort
Arrange information in a logical structure
Plan sections and paragraphs
- Draft
Main body
Introduction and conclusion
References
- Edit (and proofread)
For sense and logical flow
For grammar and spelling
For length
My Learning Essentials offers a number of online resources and workshops that will help you to, understand the importance of referencing your sources, use appropriate language and style in your writing, write and proofread your essays. For more information visit the writing skills My Learning Essentials pages: http://www.library.manchester.ac.uk/services-and-support/students/support-for-your-studies/my-learning-essentials/
1. Analyse the question
Many students write great essays — but not on the topic they were asked about. First, look at the main idea or topic in the question. What are you going to be writing about? Next, look at the verb in the question — the action word. This verb, or action word, is asking you to do something with the topic.
Here are some common verbs or action words and explanations:
| Analyse | Take to pieces and determine what makes up the various parts. This involves examining something minutely and critically. |
| Compare | Liken one thing to another, and discuss the degree of likeness or unlikeness. |
| Contrast | Set things in opposition so as to show the difference between them. |
| Criticise | Weigh up all aspects by careful examination, and deliver an opinion upon them. |
| Define | Give the exact meaning. |
| Describe | Set out the features, qualities or properties of what is asked, in detail. |
| Discuss | Consider or examine by argument, investigate for and against. |
| Enumerate | Specify the items by numbering the points. |
| Evaluate | Interpret, analyse (take apart the whole), then synthesise (put together) the significant points and make a judgement upon them. |
| Examine | Inquire into, investigate by considering critically, thereby weighing and sifting information/opinions. |
| Explain | Make plain, clear; unfold and illustrate the meaning of. |
| Illustrate | Make clear, explain by means of description, examples, diagrams and figures. |
| Interpret | Explain the meaning of - which generally involves translating information from one form to another (for example, putting a graph into words), thereby showing a complete understanding of it. |
| Justify | Prove or show to be just or right; to show grounds for. |
| List | Number the items or ideas down the page. |
| Outline | Give the main general features, facts or principles. |
| Prove | Demonstrate by argument or reasoning, test. |
| Relate | Tell, recount; establish relation between. |
| Resolve | Separate into its component parts (analyse) and explain. |
| Review | Go back over and look carefully and critically. |
| State | Set out the facts with explicitness and formality. |
| Summarise | Give a concise account of the main points. |
2. Research
Once you have analysed the question, start thinking about what you need to find out. It’s better and more efficient to have a clear focus for your research than to go straight to the library and look through lots of books that may not be relevant.
Start by asking yourself, 'What do I need to find out?' Put your ideas down on paper. A mind map is a good way to do this. Useful questions to start focusing your research are: What? Why? When? How? Where? Who?
My Learning Essentials offer a number of online resources and workshops to help you to plan your research. Visit the My Learning Essentials page: http://www.library.manchester.ac.uk/services-and-support/students/support-for-your-studies/my-learning-essentials/workshops-and-online-resources/
3. Plan and sort
Reading
First, scan through your source. Find out if there's any relevant information in what you are reading. If you're reading a book, look at the contents page, any headings, and the index. Stick a Post-It note on useful pages.
Next, read for detail. Read the text to get the information you want. Start by skimming your eyes over the page to pick our relevant headings, summaries, words. If it's useful, make notes.
Making notes
There are two rules when you are making notes:
- Note your source so that you can find it again and write your references at the end of the essay if you use that information. Use Endnote (see the section on Referencing), or note down the following:
- author(s)
- title
- page reference
- date of publication
- publisher's name (book)
- place where it was published (book or journal)
- the journal number, volume and date (journal)
- Make brief notes rather than copy text, but if you feel an extract is very valuable put it in quotation marks so that when you write your essay, you'll know that you have to put it in your own words. Failing to rewrite the text in your own words would be plagiarism.
For more information on plagiarism, refer to the semester 1 section of this handbook, the First Level Handbook, and the My Learning Essentials Plagiarism Resource http://libassets.manchester.ac.uk/mle/avoiding-plagiarism/
Everyone will make notes differently and as it suits them. However, the aim of making notes when you are researching an essay is to use them when you write the essay. It is therefore important that you can:
- Read your notes
- Find their source
- Determine what the topics and main points are on each note (highlight the main ideas, key points or headings).
- Compose your notes so you can move bits of information around later when you have to sort your notes into an essay.
For example:
- Write/type in chunks (one topic for one chunk) with a space between them so you can cut your notes up later, or
- write the main topics or questions you want to answer on separate pieces of paper before you start making notes. As you find relevant information, write it on the appropriate page. (This takes longer as you have to write the source down a number of times, but it does mean you have ordered your notes into headings.)
Sort information into essay plans
You've got lots of information now: how do you put it all together to make an essay that makes sense? As there are many ways to sort out a huge heap of clothes (type of clothes, colour, size, fabric…), there are many ways of sorting information. Whichever method you use, you are looking for ways to arrange the information into groups and to order the groups into a logical sequence. You need to play around with your notes until you find a pattern that seems right and will answer the question.
- Find the main points in your notes, put them on a separate page - a mind map is a good way to do this - and see if your main points form any patterns or groups.
- Is there a logical order? Does one thing have to come after another? Do points relate to one another somehow? Think about how you could link the points.
- Using the information above, draw your essay plan. You could draw a picture, a mind map, a flow chart or whatever you want. Or you could build a structure by using bits of card that you can move around.
- Select and put the relevant notes into the appropriate group so you are ready to start writing your first draft.
- Draft
The essay has four main parts:
- introduction
- main body
- conclusion
- references.
People usually write the introduction and conclusion after they have written the main body of the essay, so we have covered the essay components in that order below.
For more information on essay writing visit the My Learning Essentials web pages:
Main Body
Structure. The main body should have a clear structure. Depending on the length of the essay, you may have just a series of paragraphs, or sections with headings, or possibly even subsections. In the latter case, make sure that the hierarchy of headings is obvious so that the reader doesn't get lost.
Flow. The main body of the essay answers the question and flows logically from one key point to another (each point needs to be backed up by evidence [experiments, research, texts, interviews, etc …] that must be referenced). You should normally write one main idea per paragraph and the main ideas in your essay should be linked or 'signposted'. Signposts show readers where they are going, so they don't get lost. This lets the reader know how you are going to tackle the idea, or how one idea is linked with the one before it or after it.
Some signpost words and phrases are:
- 'These changes . . . "
- 'Such developments
- 'This
- 'In the first few paragraphs . . . "
- 'I will look in turn at. . . '
- 'However, . . . "
- 'Similarly'
- 'But'.
Figures: purpose. You should try to include tables, diagrams, and perhaps photographs in your essay. Tables are valuable for summarising information, and are most likely to impress if they show the results of relevant experimental data. Diagrams enable the reader to visualise things, replacing the need for lengthy descriptions. Photographs must be selected with care, to show something meaningful. Nobody will be impressed by a picture of a giraffe - we all know what one looks like, so the picture would be mere decoration. But a detailed picture of a giraffe's markings might be useful if it illustrates a key point.
Figures: labelling, legends and acknowledgment. Whenever you use a table, diagram or image in your essay you must:
- cite the source
- write a legend (a small box of text that describes the content of the figure).
- make sure that the legend and explanation are adapted to your purpose.
For example: Figure 1. The pathway of synthesis of the amino acid alanine, showing... From Bloggs (1989). [When using a figure originally produced by someone else, never use the original legend, because it is likely to have a different Figure number and to have information that is not relevant for your purposes. Also, make sure that you explain any abbreviations or other symbols that your reader needs to know about the Figure, including details of different colours if they are used to highlight certain aspects of the Figure].
Checklist for the main body of text
- Does your text have a clear structure?
- Does the text follow a logical sequence so that the argument flows?
- Does your text have both breadth and depth - i.e. general coverage of the major issues with in-depth treatment of particularly important points?
- Does your text include some illustrative experimental results?
- Have you chosen the diagrams or photographs carefully to provide information and understanding, or are the illustrations merely decorative?
- Are your figures acknowledged properly? Did you label them and include legend and explanation?
Introduction
The introduction comes at the start of the essay and sets the scene for the reader. It usually defines clearly the subject you will address (e.g. the adaptations of organisms to cold environments), how you will address this subject (e.g. by using examples drawn principally from the Arctic zone) and what you will show or argue (e.g. that all types of organism, from microbes through to mammals, have specific adaptations that fit them for life in cold environments). The length of an introduction depends on the length of your essay, but is usually between 50 to 200 words.
Remember that reading the introduction constitutes the first impression on your reader (i.e. your assessor). Therefore, it should be the last section that you revise at the editing stage, making sure that it leads the reader clearly into the details of the subject you have covered and that it is completely free of typos and spelling mistakes.
Check-list for the Introduction
- Does your introduction start logically by telling the reader what the essay is about - for example, the various adaptations to habitat in the bear family?
- Does your introduction outline how you will address this topic - for example, by an overview of the habitats of bears, followed by in-depth treatment of some specific adaptations?
- Is it free of typos and spelling mistakes?
Conclusion
An essay needs a conclusion. Like the introduction, this need not be long: 50 to 200 words is sufficient, depending on the length of the essay. It should draw the information together and, ideally, place it in a broader context by personalising the findings, stating an opinion or supporting a further direction which may follow on from the topic. The conclusion should not introduce facts in addition to those in the main body.
Check-list for the Conclusion
- Does your conclusion sum up what was said in the main body?
- If the title of the essay was a question, did you give a clear answer in the conclusion?
- Does your conclusion state your personal opinion on the topic or its future development or further work that needs to be done? Does it show that you are thinking further?
References
In all scientific writing you are expected to cite your main sources of information. Scientific journals have their own preferred (usually obligatory) method of doing this. The piece of text below shows how you can cite work in an essay, dissertation or thesis. Then you supply an alphabetical list of references at the end of the essay. The Harvard style of referencing adopted at the University of Manchester will be covered in the Writing and Referencing Skills unit in semester 2. For more information refer to the Referencing Guide from the University Library (http://subjects.library.manchester.ac.uk/referencing/referencing-harvard).
Citations in the text
Jones and Smith (1999) showed that the ribosomal RNA of fungi differs from that of slime moulds. This challenged the previous assumption that slime moulds are part of the fungal kingdom (Toby and Dean, 1987). However, according to Bloggs et al. (1999) the slime moulds can still be accommodated in the fungal kingdom for convenience. Slime moulds are considered part of the Eucarya domain by Todar (2012).
Reference list at the end of the essay:
List the references in alphabetical order and if you have several publications written by the same author(s) in the same year, add a letter (a,b,c…) after the year to distinguish between them.
Bloggs, A.E., Biggles, N.H. and Bow, R.T. (1999). The Slime Moulds. 2nd edn. London and New York: Academic Press.
[Guidance: this reference is to a book. We give the names of all authors, the publication date, title, name of publisher and place of publication. Note that we referred to Bloggs et al.(1999) in the text. The term "et al." is an abbreviation of the Latin et alia (meaning "and others"). Note also that within the text "Bloggs et al." is part of a sentence, so we put only the date in parentheses for the citation in the text. If you wish to cite the entire book, then no page numbers are listed. To cite a specific portion of a book, page numbers are added following the book title in the reference list (see Toby and Dean below).
Todar K. (2012) Overview Of Bacteriology. Available at: http://textbookofbacteriology.net, [Accessed 15 November 2013].
[Guidance: this reference is to a website. We give the name of the author (or organisation if there is no author or write “anonymous” if no other option is available) and the full URL (web address). It is important to state when you accessed the site, because the information on web sites can change.]
Jones, B.B. and Smith, J.O.E. (1999). Ribosomal RNA of slime moulds, Journal of Ribosomal RNA 12, 33-38.
[Guidance: this is a reference to a published scientific paper. We give the names of all authors, the date, title of the paper, the journal name (in italics), volume number and page numbers (first and last) of the paper.]
Toby F.S. and Dean P.L. (1987). Slime moulds are part of the fungal kingdom, in Edwards A.E. and Kane Y. (eds.) The Fungal Kingdom. Luton: Osbert Publishing Co., pp. 154-180.
[Guidance: this is a reference to a chapter in a book edited by Edwards and Kane. We give the names of all authors, date, title of the article, editors of the book, title of the book, first and last page numbers of the chapter cited, publisher and place of publication. Note how we cited this reference (Toby and Dean, 1987) in the text. We put the whole reference in brackets because it was not part of the sentence. If we wanted to put two references in brackets, we would write: (Toby and Dean, 1987; Todar, 2012). Typically, we would use chronological order (1987 before 2012) and separate the two references by a semicolon.]EndNote: This is an electronic system for storing and retrieving references. It is very powerful and simple to use, but you must always check that the output is consistent with the instructions given in this section. EndNote will be covered (and assessed) in the Writing and Referencing Skills online unit in Semester 2 to help you research and reference your written work.
Visit the My Learning Essentials online resource for a guide to using EndNote: https://www.escholar.manchester.ac.uk/learning-objects/mle/endnote-guide/
(we recommend EndNote online if you wish to use your own computer).
Note that journals have their own house style so there will be minor differences between them, particularly in their use of punctuation, but all reference lists for the same journal will be in the same format.
First Draft
When you write your first draft, keep two things in mind:
- Length: you may lose marks if your essay is too long. Ensure therefore that your essay is within the page limit that has been set.
- Expression: don't worry about such matters as punctuation, spelling or grammar at this stage. You can get this right at the editing stage. If you put too much time into getting these things right at the drafting stage, you will have less time to spend on thinking about the content, and you will be less willing to change it when you edit for sense and flow at the editing stage.
- Edit
Writing style
The style of your essay should fit the task or the questions asked and be targeted to your reader. Just as you are careful to use the correct tone of voice and language in different situations so you must take care with your writing. Generally writing should be:
- Make sure that you write exactly what you mean in a simple way.
- Write briefly and keep to the point. Use short sentences. Make sure that the meaning of your sentences is obvious.
- Check that you would feel comfortable reading your essay if you were actually the reader.
- Make sure that you have included everything of importance. Take care to explain or define any abbreviations or specialised jargon in full before using a shortened version later. Do not use slang, colloquialisms or cliches in formal written work.
Editing.
When you are editing your essay, you will need to bear in mind a number of things. The best way to do this, without forgetting something, is to edit in 'layers', using a check-list to make sure you have not forgotten anything.
Check-list for Style
- Tone - is it right for the purpose and the receiver?
- Clarity - is it simple, clear and easy to understand?
- Complete - have you included everything of importance?
Check-list for Sense
- Does your essay make sense?
- Does it flow logically?
- Have you got all the main points in?
- Are there bits of information that aren't useful and need to be deleted?
- Are your main ideas in paragraphs?
- Are the paragraphs linked to one another so that the essay flows rather than jumps from one thing to another?
- Is the essay within the page limit?
Check-list for Proofreading
- Are the punctuation, grammar, spelling and format correct?
- If you have written your essay on a word-processor, run the spell check over it.
- Have you referenced all quotes and names correctly?
- Is the essay written in the correct format? (one and a half line spacing, margins at least 2.5cm all around the text, minimum font size 10 point).
School Writer in Residence
The School has three ‘Writers in Residence’ who are funded by The Royal Literary Fund.
They are:
Susan Barker - Monday and Friday
Tania Hershman - Tuesday
Katherine Clements - Wednesday and Thursday
The Writers in Residence are based in the Simon Building. Please see the BIOL10000 Blackboard site for further information about the writers’ expertise and instructions for appointment booking.

Appendix 3: Semester 1 Poster Session
Poster displays are an important means of presenting research findings at scientific meetings. They provide an opportunity for direct interaction and discussion with other conference attendees allowing exchange of ideas. In your tutorials you will prepare a poster for presentation at a Faculty Poster Event, which will be held on Tuesday 12th December at 1:30 p.m. or 2:30 p.m. (Week 12). You should use the card provided (see below) as a base and be as creative as possible. We are not looking for professionally-produced PowerPoint posters!
Aims
The purpose of this assignment is to develop team skills and presentation skills by designing a poster to illustrate and describe a current scientific topic.
Objectives
In completing this exercise you will acquire expertise in:
- presenting scientific information in a concise, organised and attractive way
- collaborating with others and working in a group
- using a variety of information sources to construct the poster e.g. journals, internet, etc.
What makes a good poster?
It should:
- have visual impact
- retain the reader’s attention
- be interesting, topical and stimulating: e.g. a current, high profile scientific issue
- be accurate; do not use dubious sources of information, be sure information is correct
- be easy to read with a clear, large font
- avoid crowded tables and over-long figure legends
- include your names and degree programme on the poster.
Examples of posters from previous first years are displayed in 1MUL and 2MUL.
Practical arrangements
Collect two contrasting pieces of card to make your poster from Stopford Central Stores (Ground Floor). Look out for emails during the second half of semester 1, with details of what you need to do ahead of the poster event and on the day. Ensure your poster is ready and on display in the designated area by 12:30 p.m. on Tuesday December 12th. All members of the tutorial group must be present and able to answer questions about the poster during the Poster Event.
Assessment
Your Advisor will mark posters based on the following criteria: quality of science, visual impact, organisation of information, readability and contribution of the whole group. All members of the group should put an approximately equal effort into the poster production and will normally be given the same mark. However, if anyone puts in considerably more or less effort than average, their mark may be adjusted accordingly. All students in the group are expected to be able to discuss the poster and this is one of the assessment criteria. Therefore, attendance at the Poster Event is a compulsory part of the Tutorial Unit and failure to attend will result in a 20% reduction in the mark awarded.
Prizes
In addition to the individual poster marks, prizes will be awarded for the best posters in each session as voted by (i) academic judges from the School of Biological Sciences and (ii) the students.
Any comments or queries about the Poster Event that cannot be answered by your Advisor should be addressed to: caroline.milner@manchester.ac.uk.
Appendix 4: Oral presentations

Nervous? Everybody is nervous at the idea of giving a talk. The good news is that you will undoubtedly get less nervous as you become more experienced and more proficient. The bad news is that nobody ever quite gets over the jitters. This appendix will provide you with a few tips to help you design your first oral presentation and hopefully make it a good one.
A talk is normally divided in much the same way as a scientific paper with an Introduction, Methods, Results, Discussion/Conclusion and Acknowledgements. You don’t need to actually have slides labelled as such but this structure should be evident in your talk. Try to remember the following piece of advice. If you understand its message it will stand you in good stead: “First you tell them what you are going to tell them, then you tell them, then you tell them what you told them”
Tips for public speaking
- Start and end well. You will be most nervous at the beginning of your talk and here is where you must set the talk moving in the right direction to capture people’s attention. It is therefore absolutely critical that you know exactly what you are going to say in the first few minutes. Rehearse your opening lines thoroughly. When you have finished the main part of your talk how do you end? Never, never find yourself having to say “Well that’s it” to a sea of puzzled faces! They need to know when you are going to end, so again this must be prepared in advance. Spend a disproportionate share of your preparation time on starting and finishing well.
- Look at the audience. This is a difficult one for beginners since it really requires you to learn to speak mainly from notes. Most students are so terrified on giving a talk that they seek the security of a written script. Throw your script away. A script, in a single swoop, cuts the speaker off from the audience and bars any interaction between them.
- Practice Like everything else, oral presentation is a skill which improves with practice.
- Enthusiasm. If you appear bored you will automatically convince your audience that what you are talking about is boring.
- Your voice. You need to speak loudly enough so that the person at the back of the room can hear you. Project, don’t shout!
- Humour. Some of the most accomplished speakers entertain while at the same time informing. However, for the beginner the vast majority of jokes, silly drawings etc. can fall flat on their proverbial faces. Introducing humour into a talk is really very difficult and is really best avoided by the beginner. If you are in any doubt leave it out!
- Time keeping. Stick to it. Even experienced speakers often fail to understand that the extra ten minutes taken to display some fascinating new data that just must be shared, is actually an indulgence imposed on a (nearly always) unwilling audience. The only way you will know that your talk is the right time is to practice it beforehand.
- Projectors and props. How many times have you been to a lecture where the speaker wrestles with the visual aids, has no idea how turn down the lights, can’t a find pointer etc ? Before the session in which you are giving your presentation, go to the front and find out how to switch things on or off.Keep them simple. Be scrupulous in removing extraneous detail. Avoid complicated diagrams and putting too much information on a slide.
- Slides should be simple to follow and informative. Mark both axes of every graph and always state the units. Mention in words what each axis shows. Do not expect the audience to be able to read all the detail you have on the slide and listen to you and interpret both. One slide per minute is a good general rule for keeping to time.
- Check your presentation before your talk to determine that the slides convey the information you want them to and that they are legible from the back of the lecture theatre/seminar room.
(Adapted from article by Prof. N. Gow, Aberdeen University)
Appendix 5: Generic guidelines for laboratory/ field report writing
Text that differs from Appendix 6 (i.e. items not necessary in a scientific poster) is identified in blue.
Below are generic guidelines on how to write a laboratory or field report. Specific information regarding the format and length of the field project report will be available in the assessment area on Blackboard of each field unit. NB: Any question regarding the content of the practical needs to be directed to the member of staff in charge of the field course – **NOT** to your Academic Advisor.
A lab/field write-up is designed to provide sufficient experimental detail so that anyone could, in theory, perform the experiment(s) to the same specification that you have followed. It should also accurately report your findings (results/data), include an evaluation of the accuracy and limitations of your data, and conclude with a discussion of this data with reference to the experimental aims and what others have published on the topic.
In a laboratory/field report, you therefore need to describe why you did an experiment, how you did it, what happened and what the results mean - did you expect these results? Why/ why not? How do they compare to what is published? Are there any limitations to your experimental method? To achieve this, you must spend time identifying the most effective way to present your data, remove any information that is superfluous, and write in a clear and concise manner.
NB: In scientific writing, the traditional convention is to use the past, impersonal tense (e.g. “blood pressure was measured every 10 min for 1 hour” rather than “I measured the blood pressure every 10 min for 1 hour”). This will apply to all sections of the report. Note however that this convention can vary slightly and in ‘real life’ each publisher provides detailed guidelines to authors which scientists must strictly follow.
The write-up must be written in your own words (see notes on collusion and plagiarism in the First Level Handbook). If it is not, you will be penalised.
- As in an essay, when referring to the work of others, appropriate citations and acknowledgement of the source of information must be included in the report text, and full references listed at the end (see section on referencing in Appendix 2). NB: Similarly to lecture notes, the field course manual is not a source that is available outside this University, so you should not refer to it in the text, nor copy any part of it; instead you should find other sources that convey similar information.
- As many practicals involve group work, it is possible that the data you will present will be very similar, if not identical, to another student’s data. This is perfectly acceptable provided that the content of the report is thought through and written independently.
Personal details
Should include Swipe Card Number and Degree Programme in a header or footer.
Title
This should be a succinct and descriptive statement that clearly indicates the subject matter of the report.
Introduction
The introduction should give a short and clear account of the background or theory behind the experiment (progressing from general to specific). It should give an outline of the scientific purpose(s) or objectives of the experiment and place the work in context, with supporting references where appropriate. The introduction should end with a short paragraph stating the aims of the experiment and how you intended to achieve them. You will need to cite your sources of information in the right places and provide the full reference at the end (see section on referencing in Appendix 2). You can also include figures to enhance your text, but make sure that you always refer to every figure in the text, number it, and give it a title and an appropriate legend.
Material and Methods
The materials and methods used must be described in sufficient detail to allow the experiments to be interpreted and repeated by the reader.
Typically, what we provide in the manual in recipe style needs to be rewritten. You first need to identify superfluous information (e.g. turning the heat block on at 100ºC, describing which pipette you used to get 80μl). You then need to transform the bullet point lists of instructions into a description of what you did as prose in impersonal past tense, e.g. Water (10 ml) was swirled in the mouth vigorously for 1 min to collect cheek cells (N.B. You should not start a sentence with a numeral (e.g. 10 ml of water….).
You should use subheadings for each experimental stage. Usually, one first describes the specimen used (e.g. bacteria strains used, inclusion criteria and consenting process for human volunteers), culture conditions if appropriate, sample preparation, measurement methods (there may be several subsections), and to conclude a section on data analysis/calculations/statistics as appropriate. Only include a figure for a complex experimental setting if you think it will help the reader.
Major items of equipment should normally be described in the text, including make and model number, but trivial things such as pipettes, cuvettes etc need not be described in detail. NB: If you did not write down the models of the equipment used in class, then write (model unknown) after the major pieces of equipment described.
The volume and concentration of reagents, drugs, buffers and other chemicals should be described as appropriate, referring to final concentrations when possible and concentrations should be given in terms of molarity. E.g. You are expected to write: ‘the forward primer was added to the PCR mix to a final concentration of 600 nM’, rather than ‘forward primer (2 µl) at a concentration of 12 µM was added to the PCR mix (final volume 40 µl)’. Both sentences are correct, but the first one is more appropriate because the person who will follow your instructions may not have a primer stock at a concentration of 12 µM, or may decide to run a PCR in a final volume of 50 µl instead of 40 µl. Giving them the final concentration is therefore more useful to them.
The data analysis/calculations/statistics paragraph describes how the data have been processed (often justifying why) and which statistical package was used. E.g.
- Data are presented as mean ± SD.
- Raw data were converted into […] using [formula].
- Data were tested for normality with [name of test] (most adequate for sample size of …) using GraphPad Prism v2.3. When the data followed the normal distribution, [name of test] was used to determine [justify test/aim]. For data not normally distributed, [name of test] was used. P values <0.05 were considered to be statistically significant.
Results
The Results section should NOT be merely a series of figures and tables that the reader must interpret. It is a written section, often organised with subheadings, that comprises a text description of your results (raw, processed, and statistics where appropriate). The Results section is the narrative (story) part of the report; people who read it should be able to follow everything that you have done experimentally in this practical (and why you have done it). N.B. Further experimental details are specified in the “Materials and Methods” section, and further discussion of what the results mean in the wider context of the literature is included in the Discussion. In other words, a person should be able to read just the Results section without reading anything else, and still be able to grasp what has been done, why, and what the result of each experiment was, at least generally. The description of the experimental results should be succinct, but in sufficient detail so that readers who repeat your experiments can compare their results to yours. Where appropriate, the mean results, with standard errors of the means and the number of observations, should be given.
Data should be presented in the form of figures and/or tables (but the same data should not be shown in both forms). Each should be numbered sequentially (i.e. Figure 1 – Figure 10, and Table 1 – Table 10). Each figure/table should have a legend, including a meaningful title and any essential details required to understand the data. A key should be provided if abbreviations or special symbols are used and all axes should be labelled properly. Make sure you explain the meaning of arrows, brackets, etc. where this is not obvious (don’t assume that the reader has expert knowledge of these experiments). Refer to this source to present figures and tables: http://abacus.bates.edu/~ganderso/biology/resources/writing/HTWtablefigs.html
Figures and tables are an essential part of the Results section, but they are not presented as the central piece; they are there to illustrate points made in the text, or give more details on the results that are presented succinctly in the text. In the text, add value to your figures and tables. For example, a graph may show that the mean of one treatment (mean A) is higher than the mean of the control treatment (mean B); when you describe this increase in the text, quantify this increase, e.g. mean A was 2 fold higher than mean B (see figure 1).
Remember to include units for all variables and do not use an excessive number of decimal places. The general rule is to only give as many decimal places as you can actually measure e.g. for blood pressure, you can only measure to the nearest whole number, so report systolic blood pressure as 121 mmHg, not 120.56784 mmHg. Just because your calculator will give 8 decimal places, it doesn’t mean that your measurements are that accurate!
Statistical tests of significance should be performed where appropriate. The description of the outcome of the statistical analysis should be incorporated into the general description of the results; it should not be given in a separate section. Remember that the aim of statistics is to tell you whether the interesting things that seem to be happening are likely to be real effects.
Below are two examples of how a result and its statistical analysis can be reported:
- “Drug X increased systolic blood pressure from 120 ± 2 mmHg to 150 ± 3 mmHg 10 min after administration (see figure 2). This 1.25 fold increase was statistically significant (paired t-test, n = 10, t= 4.36, P < 0.01)”.
- A two sample t test showed that the treated mice 1.62 (SE 0.14) g were significantly heavier than controls whose mean weight was 1.23 (SE 0.13) g (t9 = 4.56, p = 0.012)
Discussion
The discussion usually starts by referring back to the aims of the experiment and states whether these aims have been met. It continues by describing how you arrived at your conclusions, including any assumptions that you have made.
While discussing data, you should present your interpretation of the results against the background of existing knowledge (i.e. scientific literature). Do your data agree with previous experiments or the theoretical framework of the experiment (your elements of comparison need to be described here if you did not do so in the Introduction)? If not, why might this be the case? Do not copy information from other sources, rather, describe the findings of other scientists in your own words and include a citation to their original work. It is expected that you will be using citations quite a lot in the Introduction, when talking about the background information, and again, in the Discussion section, because there you will be comparing your results to the literature.
It is appropriate in this section to suggest improvements or future experiments that could be performed, but please do not give a long list of things that went wrong with your experiment, as it is assumed that you carried out the current experiment to the best of your ability.
The discussion usually concludes with a concluding paragraph summarising the main outcome(s) of the experiment(s) and what you think the results mean.
References
Refer to Appendix 2 for details of how to cite references.
PLEASE NOTE THAT ADVISORS WILL NOT READ OR COMMENT ON DRAFT VERSIONS OF YOUR WRITE-UP. FEEDBACK WILL BE PROVIDED ON THE SUBMITTED REPORT ONLY.
Appendix 6: Generic guidelines for producing a scientific poster to present laboratory practical data in Semester 2
Text that differs from Appendix 5 (i.e. items specific to a scientific poster) is identified in blue.
Below are generic guidelines on how to produce a scientific poster. Specific information regarding the content and format, and resources to help with its production will be available in the assessment area on the Blackboard sites of the practical unit you have enrolled on. NB: Any question regarding the content of the specific practical needs to be directed to the member of staff in charge of the practical - **NOT** to your Academic Advisor.
A scientific poster is a concise version of a lab write-up which tends to be focused largely on the methods and results, with a brief introduction and aims and a concise conclusion. You should provide sufficient experimental detail so that anyone could, in theory, perform the experiment(s) to the same specification that you have followed. It should also accurately report your findings using appropriate graphs/ tables, which should be described using text. The conclusion should state briefly what the results show and why these findings are important.
N.B. This is different from a complete lab write-up or field report, which would also include a more detailed introduction, reviewing similar recent studies, an evaluation of the accuracy and limitations of your data, and a discussion of this data, with reference to the experimental aims and what others have published on the topic. Appendix 5 and the online resources provided present what is included in a full report and test your understanding of how to write a full report.
Opening remarks:
- Many practicals involve group work, so it is possible that the data you will present will be very similar if not identical to another group’s data, but it is crucial that the poster is thought through and written independently as a team to avoid collusion and plagiarism, as otherwise you will be penalised (see the practical unit introduction document (course information area) and the First Level Handbook)
- A poster is a short communication, so one of your big challenges will consist of identifying the most effective way to present your data, removing any information that is superfluous, and writing in a clear and concise manner.
- NB: In scientific writing, the traditional convention is to use the past, impersonal tense (e.g. “blood pressure was measured every 10 min for 1 hour” rather than “I measured the blood pressure every 10 min for 1 hour”). This will apply to all sections of the poster. Note however that this convention can vary slightly and in ‘real life’ each publisher provides detailed guidelines to authors which scientists must follow strictly. As in an essay, when referring to the work of others, appropriate citations and acknowledgement of the source of information must be included in the report text, and full references listed at the end (see our advice in the references section at the end of this appendix). NB: Similarly to lecture notes, the practical manual is not a source that is available outside this University, so you should not refer to it in the text, nor copy any part of it; instead you should find other sources that convey similar information.
Title
This should be a succinct and descriptive statement that clearly indicates the subject matter of the poster.
Names of group members
These should be included underneath the title.
Introduction
The introduction should give a short account of the background or theory behind the experiment. It should give an outline of the scientific purpose(s) or objectives of the experiment and place the work in context, with supporting references where appropriate. The introduction should end by stating the aims of the experiment and how you intended to achieve them. You will need to cite your sources of information in the right places and provide the full reference at the end (see section on referencing in Appendix 2). You could also include a figure to enhance your text, but if so, it needs to be referred to in the text, numbered and given a title and an appropriate legend.
Material and Methods
The materials and methods used must be described in sufficient detail to allow the experiments to be interpreted and repeated by the reader.
Typically, what we provide in the manual in recipe style needs to be rewritten. You first need to identify superfluous information (e.g. turning the heat block on at 100ºC, describing which pipette you used to get 80 μl is NOT necessary). You then need to transform the bullet point lists of instructions into a description of what you did as prose in impersonal past tense, e.g. water (10 ml) was swirled in the mouth vigorously for 1 min to collect cheek cells. (N.B. You should not start a sentence with a numeral (e.g. 10 ml of water….).
You should use subheadings for each experimental stage. Usually, one first describes the specimen used (e.g. bacteria strains used, inclusion criteria and consenting process for human volunteers), culture conditions if appropriate, sample preparation, measurement methods (there may be several subsections), and to conclude a section on data analysis/calculations/statistics as appropriate. Only include a figure for a complex experimental setting if you think it will help the reader.
Major items of equipment should normally be described in the text, including make and model number, but trivial things such as pipettes, cuvettes etc need not be described in detail.
The volume and concentration of reagents, drugs, buffers and other chemicals should be described as appropriate, referring to final concentrations when possible and concentrations should be given in terms of molarity. E.g. You are expected to write: ‘the forward primer was added to the PCR mix to a final concentration of 600 nM’, rather than ‘forward primer (2 µl) at a concentration of 12 µM was added to the PCR mix (final volume 40 µl)’. Both sentences are correct, but the first one is more appropriate because the person who will follow your instructions may not have a primer stock at a concentration of 12 µM, or may decide to run a PCR in a final volume of 50 µl instead of 40 µl. Giving them the final concentration is therefore more useful to them.
The data analysis/calculations/statistics paragraph describes how the data have been processed (often justifying why) and which statistical package was used. E.g.
- Data are presented as mean ± SD.
- Raw data were converted into […] using [formula].
- Data were tested for normality with [name of test] (most adequate for sample size of …) using GraphPad Prism v2.3. Where the data followed the normal distribution, [name of test] was used to determine [justify test/aim]. For data not normally distributed, [name of test] was used. P values<0.05 were considered to be statistically significant.
Results
The Results section should NOT be merely a series of figures and tables that the reader must interpret. It is a written section, often organised with subheadings, that comprises a text description of your results (raw, processed, and statistics where appropriate). The Results section is the narrative (story) part of the report; people who read it should be able to follow everything that you have done experimentally in this practical (and why you have done it). N.B. Further experimental details are specified in the “Materials and Methods” section, and further discussion of what the results mean in the wider context of the literature is included in the Discussion [NB: you will not write a discussion for this poster]. In other words, a person should be able to read just the Results section without reading anything else, and still be able to grasp what has been done, why, and what the result of each experiment was, at least generally. The description of the experimental results should be succinct, but in sufficient detail so that readers who repeat your experiments can compare their results to yours. Where appropriate, the mean results with standard errors of the means and the number of observations should be given.
Data should be presented in the form of figures and/or tables (but the same data should not be shown in both forms). Each should be numbered sequentially (i.e. Figure 1 – Figure 10, and, Table 1 – Table 10). Each figure/table should have a legend, including a meaningful title and any essential details required to understand the data. A key should be provided if abbreviations or special symbols are used and all axes should be labelled properly. Make sure you explain the meaning of arrows, brackets, etc. where this is not obvious (don’t assume that the reader has expert knowledge of these experiments). Refer to this source to present figures and tables: http://abacus.bates.edu/~ganderso/biology/resources/writing/HTWtablefigs.html
Figures and tables are an essential part of the Results section; they are there to illustrate points made in the text, or give more details on the results that are presented succinctly in the text. In the text, add value to your figures and tables. For example, a graph may show that the mean of one treatment (mean A) is higher than the mean of the control treatment (mean B); when you describe this increase in the text, quantify this increase, e.g. mean A was 2 fold higher than mean B (see figure 1).
Remember to include units for all variables and do not use an excessive number of decimal places. The general rule is to only give as many decimal places as you can actually measure e.g. for blood pressure, you can only measure to the nearest whole number, so report systolic blood pressure as 121 mmHg, not 120.56784 mmHg. Just because your calculator will give 8 decimal places, it doesn’t mean that your measurements are that accurate!
Statistical tests of significance should be performed where appropriate. The description of the outcome of the statistical analysis should be incorporated into the general description of the results; it should not be given in a separate section. Remember that the aim of statistics is to tell you whether the interesting things that seem to be happening are likely to be real effects.
Below are two examples of how a result and its statistical analysis can be reported:
- “Drug X increased systolic blood pressure from 120 ± 2 mmHg to 150 ± 3 mmHg 10 min after administration (see figure 2). This 1.25 fold increase was statistically significant (paired t-test, n = 10, t= 4.36, P < 0.01)”.
- A two sample t test showed that the treated mice 1.62 (SE 0.14) g were significantly heavier than controls whose mean weight was 1.23 (SE 0.13) g (t = 4.56, p = 0.012)
Conclusion
The concluding paragraph summarises the main outcome(s) of the experiment(s) and what you think the results mean.
References
As the poster has limited space available for text, we recommend you use the Vancouver (numbered) referencing system and we allow you to write ‘et al.’ after the first author surname if there is more than one. For guidance, see http://subjects.library.manchester.ac.uk/referencing/referencing-vancouver and https://wilkes.libguides.com/c.php?g=191948&p=1266506 .
PLEASE NOTE THAT ADVISORS WILL NOT READ OR COMMENT ON DRAFT VERSIONS OF YOUR POSTER. FEEDBACK WILL BE PROVIDED ON THE SUBMITTED POSTER ONLY. It is possible that your advisor may decide to give you feedback on a draft or part of a draft write-up of a different practical that is not assessed.